Showing posts with label Enameling. Show all posts

Thursday, 29 June 2023

1st Exhibit presentation

Display
This was my final display for the exhibition that took place on the 14/06/2023. The whiteboard has my splash page stuck to explain my concept being about Mendhi pattern jewellery. 
 
Enameled etched pendant 

This is the enameled copper lotus pendant that has etched spirals underneath the enamel, attached with a silver link chain.
Enameled copper earrings 

Enameled copper earrings that consist of backing enamel to create the colour visible on the earrings. I like how the outcome turned out as it gives the look of a galaxy look. 

Cuff Bracelet
Cuff bracelet that can be used as a stack cuff bracelet. The design is inspired by the Mendhi design that begins from the wrist. 
Wrist Mendhi design

This is a reference to what is explained for the design inspired to create the cuff bracelet.

Paisley Ring
Silver paisley pattern ring with forged silver balls in the center of the paisley wire frame, attached to a twisted band as the shank for the paisley design. 

Paisley Earrings
In silver paisley earrings, the center paisley frame consists of forged silver balls that are flattened and the two side paisley have silver spirals and silver balls soldered to create a design in the paisley wire frame, finally giving a lotus look. 


Friday, 28 April 2023

Cut out plate Design

 Wednesday(26/04/2023)

Enameled plate with pierced lotus
This is an enameled plate with a pierced out lotus design that has been inserted into the kiln which fused the lotus onto the enameled plate and has been cleaned in sulphuric acid before inserting enamel into the specific parts of the lotus design. 
Amethyst enamel powder added 


This is the outcome of the amethyst enamel cooled down from the kiln.
 Green Enamel added to design
This is what the enamel powder looks when it is applied onto the piece. The powder has been mixed with a small amount of water. 

The final look of the design


Exploring design with enamling

Wednesday(26/04/2023)
Stencil
 

I was watching a tutorial video on enameling when I came across the idea of a stencil being used to add design onto the enamel, so I decided to create a mendhi design stencil. 
Designed on a piece of paper and then used a wax blade to do the cut outs of the design. 
Stencil design on plate

The stencil was placed onto the enameled plate that an opaque green as the background and I had then sifted the enamel powder onto the stencil to get the design onto the plate, inserted into the kiln and then waited for 1-2 min for the enamel to fuse onto the metal. 
Final: stenciled design


This is the final outcome once it has been removed from the kiln and cooled. 

Enameling :colour Powder

Tuesday(25/04/2023)
Enamel powder

Enamel powder is powdered glass and comes in varieties of colour.
Enamel powder and sift

The enameled powder comes in different ranges, Opaque and transparent as well as the different temperatures needed for the enameling fusing process. 

Before adding the enameled powder onto the other side you should put the copper plate once again into the acid as the oxide that has formed after the backing enamel process as the enamel will not fuse if there is oxide visible on the plate. 

Enameled plate


This is how the final outcome looks once it has cooled from the kiln.

Lotus designed with copper wire

Enamel powder with slight water added

Paint brush to add enamel in specific parts of the design.
Once the enamel is added, dab a small piece of tissue onto the wet enamel to drain abit of the water and keep the plate near the kiln to dry the enamel before adding into the kiln as it could evaporate and the enamel would not catch onto the design. 
Final look


Backing Enamel:

 Tuesday (25/04/2023)

Backing Enamel. 

Backing Enamel is a mixture of all the extra bits of enamel powders.
Backing Enamel with sift

Step 1:The backing enamel powder is then sifted onto the metal which will then be inserted into the kiln, only if the kiln has reached maximum temperature. 
Backing powder sieved onto the copper plate


step 2: The wait for piece in the kiln takes about 2-3 min depending on the size of the piece and the heat.
Enameled plate out of the kiln on the stand


Step 3: It would start looking like an orange peel texture but it would be preferable to have a smooth texture.
Backing enamel after inserted in kiln and cooled. 
Step 4: Use the steel fork to lift the stand holding the enameled plate from the kiln, the place the enameled plate on the steel block and press the enameled plate with the grip pointed trowel to cool the metal and flatten the piece. 
Step 5: Once the metal has cooled, this is the outcome.(Ref:image above)

Ingredients for the enameling:


 Tuesday(25/04/2023)
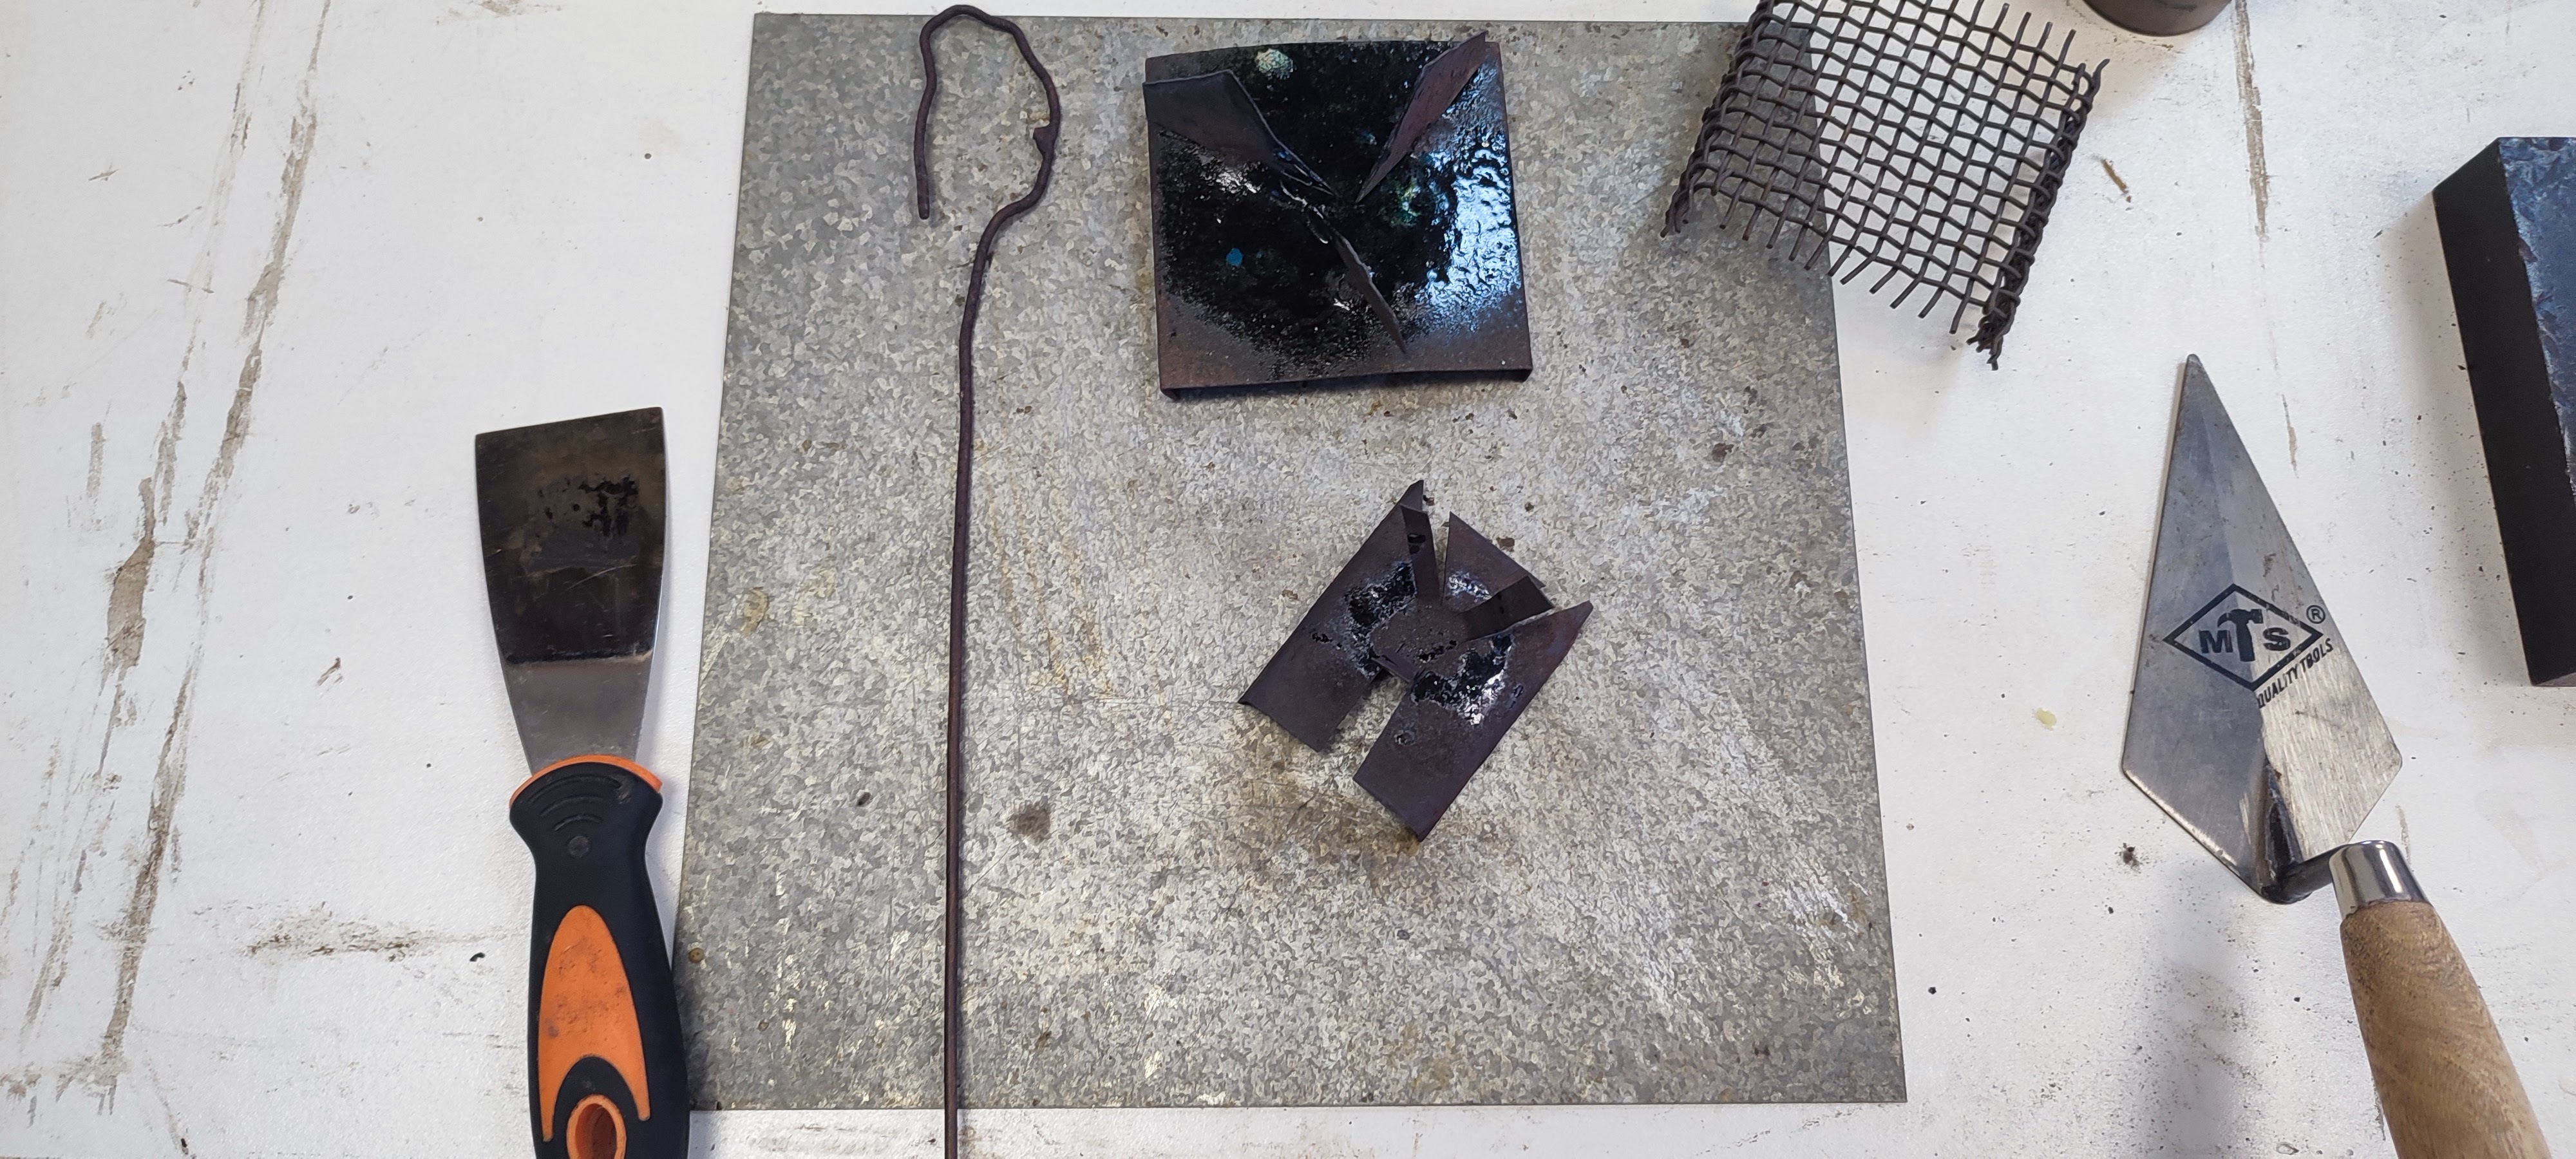
Equipment for the enameling process. 


The steel block serves only to speed up the cooling of the metal. The additional components that surround the steel block serve as stands for holding the piece of metal with the enamel on top before it is placed inside the kiln. 
When inserting the stand into the kiln, the steel fork is used to grab hold of it and hold it in place. The metal is pressed with the grip pointed trowel to flatten the metal and to speed up cooling. 
Enamel and sift 

This is the enamel(powdered glass), varies in different colours. The sift is used to ensure no rough or any other form of hard particles are added onto the metal of the design going to be enameled. 


Enameling: Experiment: The Kiln set up

 Tuesday(25/04/2023):

Kiln 

Step 1: This is the kiln where the heating process by which powdered glass is fused to metal substrate at high heat. 

Step 2: Check that the main plug is on to switch the kiln on. Then set the kiln temperature to 800 degrees.

Step 3: Wait for the kiln to reach the set temperature before inserting any pieces to be enameled. 

Enameling Experiment: Metal Prep

On Tuesday(25/04/2023) I began the enameling experimentation. This is how it all went down: 

Scrap Copper Metal 

Step 1: Collected scrap copper metal and cut them into appropriate sizes needed for the experiment.

Cut,Cleaned copper

Step 2: Cleaning the copper with acid to remove the grease and other forms that could resist for the enamel to stick onto the metal therefore you clean the metal with Sulphuric Acid and give it a good clean. Once it is cleaned, try not to touch the plate or cut out metal much as oils would make contact again with the metal. Preferable to hold the corners of the plate. 

Enameling Defined:

 Enameling 

Enameling is a process by which powdered glass is fused to a metal substrate at high heat. It can add color to metals such as copper, silver, and gold, and can be applied wet or dry.

Enameled Lotus Pendant